You never trust them, they stick to literally everything (including themselves) but they always get you up to high places. Often overlooked, skins are a fundamental piece of ski touring gear. As there are so many options on the shelves, it’s important to know how to choose climbing skins. Here’s a brief explanation of their construction. One side is layered with a special glue, formulated for cold weather, that sticks to your ski’s bases. The other is carpeted with a durable prickly fabric, usually a mix of mohair and nylon, that provide reliable traction on snow. While the concept is simple, their design is not. I’ve outlined below a few key steps that might steer you in the right direction.
Related: How To Choose Touring Skis In 2024
Be Honest With Yourself
What’s your local playground? How much experience do you have ski touring in the backcountry? Answering those questions will help you choose the climbing skins that are right FOR YOU.
For instance, I’d weigh in favour of energy-efficient mohair or hybrid skins for multi-day ski tours on mellow terrain since they provide the best glide and the least weight. For beginners, don’t bother with those as you’ll be wasting way more energy trying to gain traction on steep sections or worse when you’ll rip them apart on rocky terrain. Simply put, be honest with yourself, answer the two key questions, and, only then, start shelling out the big bucks.
Pick A Base Material
The skin’s base material completely changes how the skin behaves on snow as it determines the balance between traction and glide. You’ll find below four materials currently available on the market.
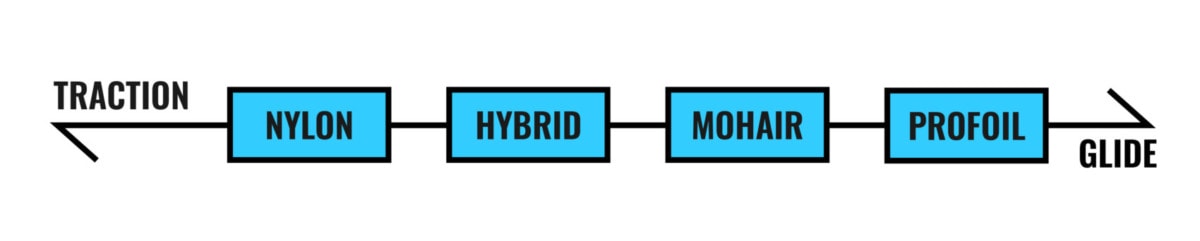
Nylon: nylon provides the best traction. It’s also the most durable at the cost of being heavier and less packable. I usually recommend nylon climbing skins to beginners as the top-tier traction will more than make up for poor uphill technique. Alternatively, nylon skins are worth picking up if your local playground is riddled with steep bushy uptracks just like mine, Rogers Pass.
Mohair: mohair provides the best glide at the expense of traction. It’s less durable than nylon but is lightweight and packable. They are awesome for multi-day ski traverses on alpine terrain where you will mostly tour up low grades. With good pathfinding and some touring experience, you can make full mohair skin work for you on steeper terrain.
Hybrid: hybrid skins offer a blend of nylon and mohair, striking a good balance between traction and glide. I usually look for a material incorporating a 60-30 mohair/nylon blend. They are the jack-of-all-trades climbing skins with the Black Diamond GliteLite STS Skins being my personal favourite for their durability and the Pomoco Pro S-Glide for their overall performance. Not too heavy nor too light with the perfect balance between glide and traction.
PROFOIL: the PROFOIL technique developed by Fisher Sports is an innovative alternative to fabric-based skins. The design is built with a flexible sheet that is patterned with plastic fish scales similar to the ones found on cheap XC skis. From what I heard, they provide excellent glide but little to no traction on steep terrain. Take it with a grain of salt as I’ve never tested them.
Check The Attachment Type
How annoying is it to have your tail clip sliding off your skis at every stride? First world problem, right? Skins come with a variety of tip loops and tail straps that secure them to your touring skis. Some hardcore alpinists even cut off the tail strap to reduce weight and bulk. While modern attachment systems work well with a wide range of skis, I’d recommend going to your local gear store to check the fit. For instance, Black Diamond sells an assortment of tip loops compatible with a specific range of ski tips.
Oli's Pro Tip
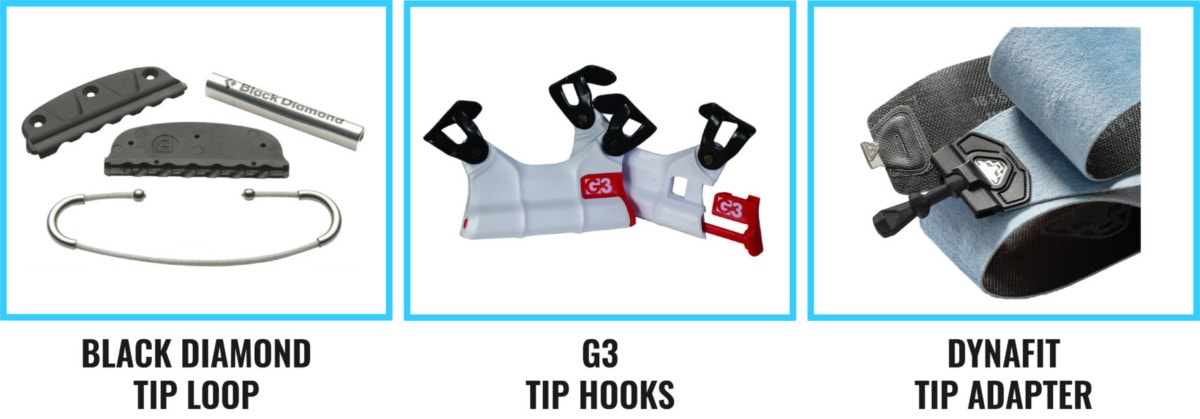
Some skins are designed with an attachment system that’s only compatible with skis of the same brand. Dynafit is a good example: their tip attachment is fitted to narrow slots in the ski’s tip. While lightweight, the feature makes reselling much more complicated. I prefer universal models for that reason.
Select A Length and A Width
The width of the fabric (before trimming) is an important factor to consider if you were to choose some climbing skins. They are generally offered in 10-cm increments. I recommend buying skins as wide as the widest point along your ski (usually located at the shovel). Then, trim the extra material by following the manufacturer’s instructions, usually leaving a 2mm gap around the edge of your ski.
Oli's Pro Tip

For obvious reasons, select a skin length that’s longer than the length of your skis. With clever sizing, you might be able to the same skins on skis of varying lengths. Mind you – the width may not match up. A skin that’s too narrow for the ski’s base makes touring on hard snow extremely difficult.
Store Your Climbing Skins
Climbing skins are very durable and good storage will extend their lifetime. While skiing, I store them in my backpack folded glue-on-glue as I don’t bother with the skin savers. Those flimsy storage sheets will flap around in the wind and most likely whip you in the face. I’m talking from experience here.
Oli's Pro Tip
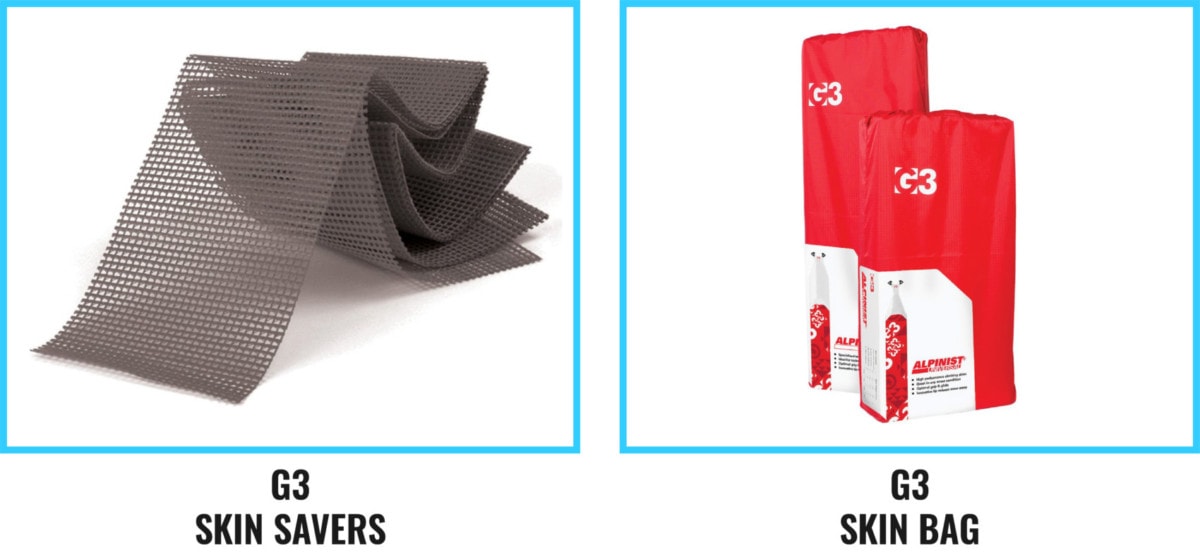
After skiing, I stretch them out on a drying rack. When dry, I fold the glue side over the plastic storage film and slide them into their storage bag. Essentially, the glue side will never come in contact with itself. In the off-season, I shelve them in a dry environment in their storage bag with skin savers applied. Some even freeze them to preserve the glue but I’m quite skeptical of this practice.
Maintain Your Climbing Skins
For the most part, climbing skins are pretty much maintenance-free, unlike your ski bases. if you ever tear them which is very easy when bushwhacking below treeline, rudimentary stitches work wonders. In below -20C weather, the glue loses some of its adhesion and may stop sticking to your bases. If that’s the case, you’ve got two options.
- Stuff the skins in your jacket to warm them up
- Secure them with multiple ski straps along the length of your skis
Oli's Pro Tip
Usually, the magical glue is rated for roughly 150 days. That’s the point where the glue simply won’t adhere to your bases. Fortunately, G3 (preferable) and Black Diamond both sell kits to rejuvenate the glue, albeit with varying degrees of success. I can guarantee it works with the right technique (wax paper and iron). However, it’s a messy, time-consuming process. At the risk of offending the environmentalist out there, it’s almost cheaper to buy a fresh set of skins than attempting a re-glue when considering your own labour.
Related Articles
– How To Choose Touring Skis in 2024
– How To Choose Ski Touring Boots in 2024
– How To Choose Ski Touring Bindings in 2024