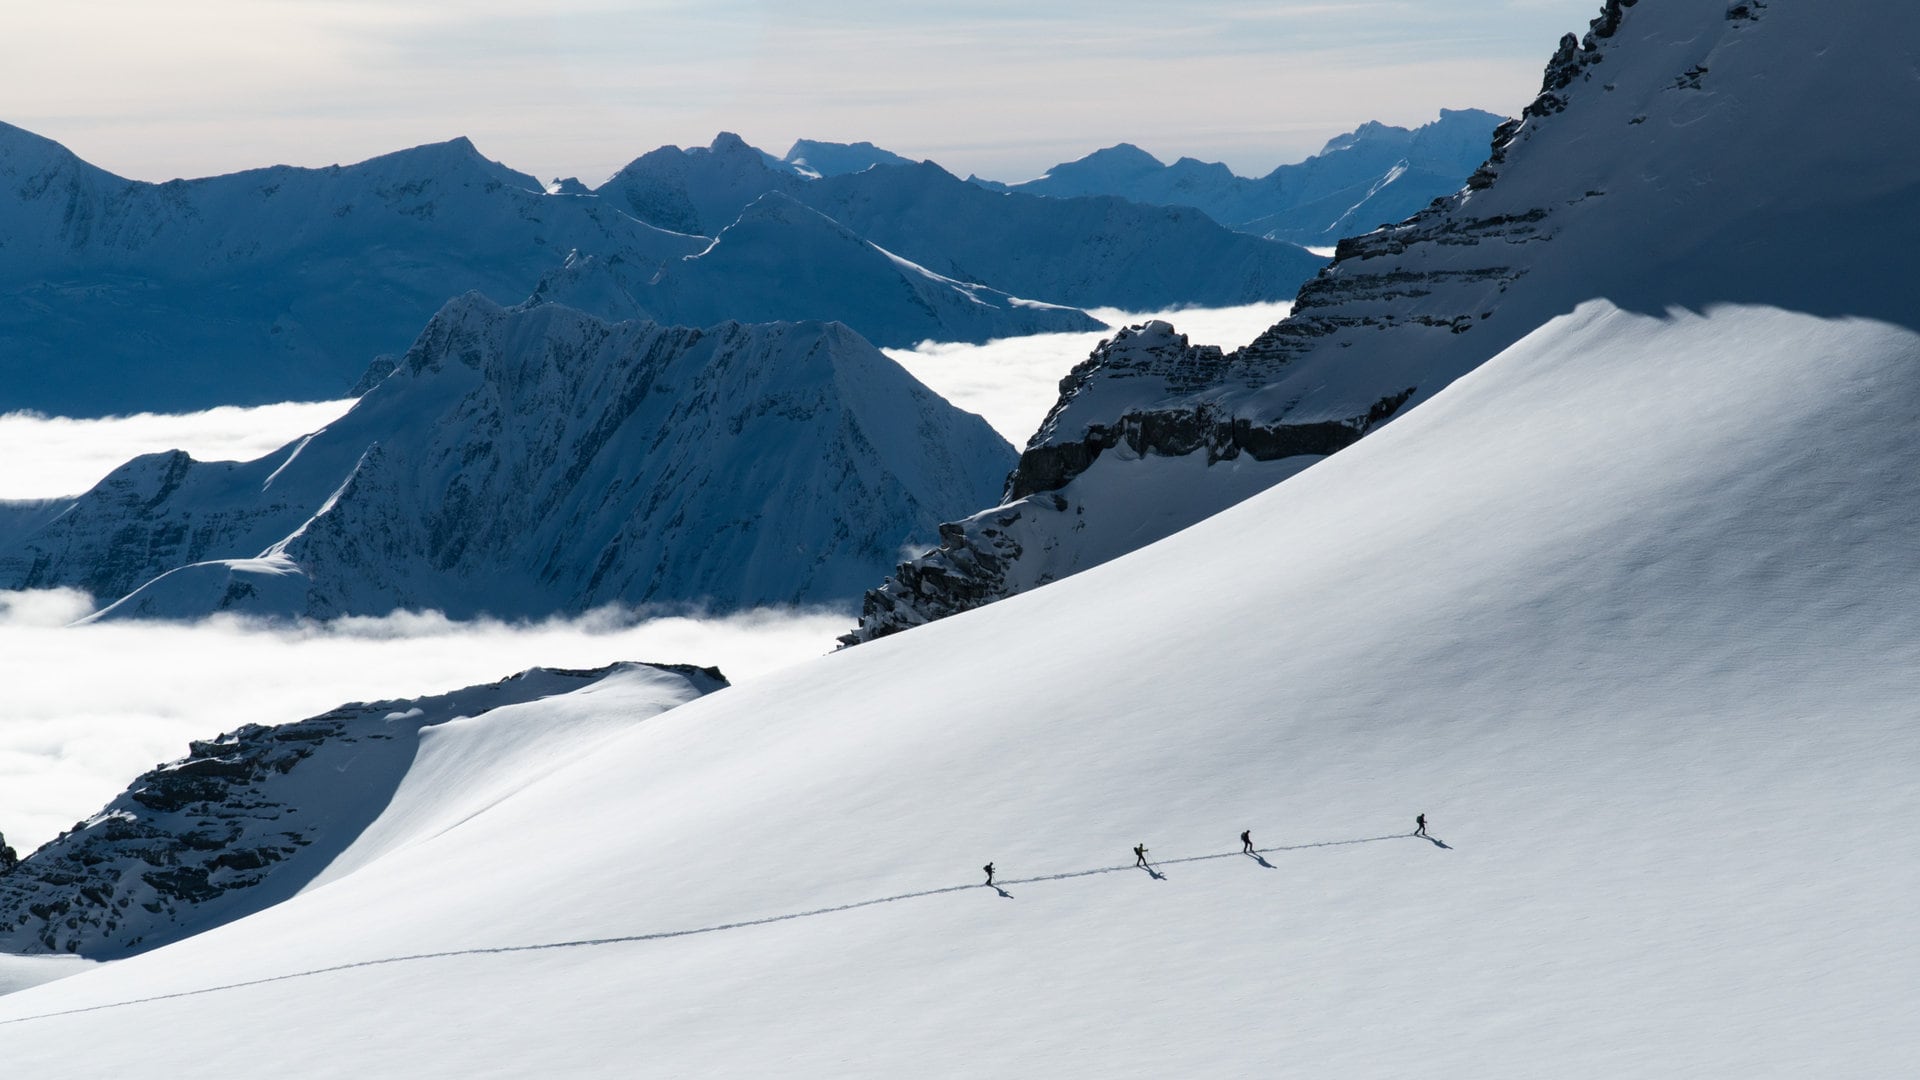
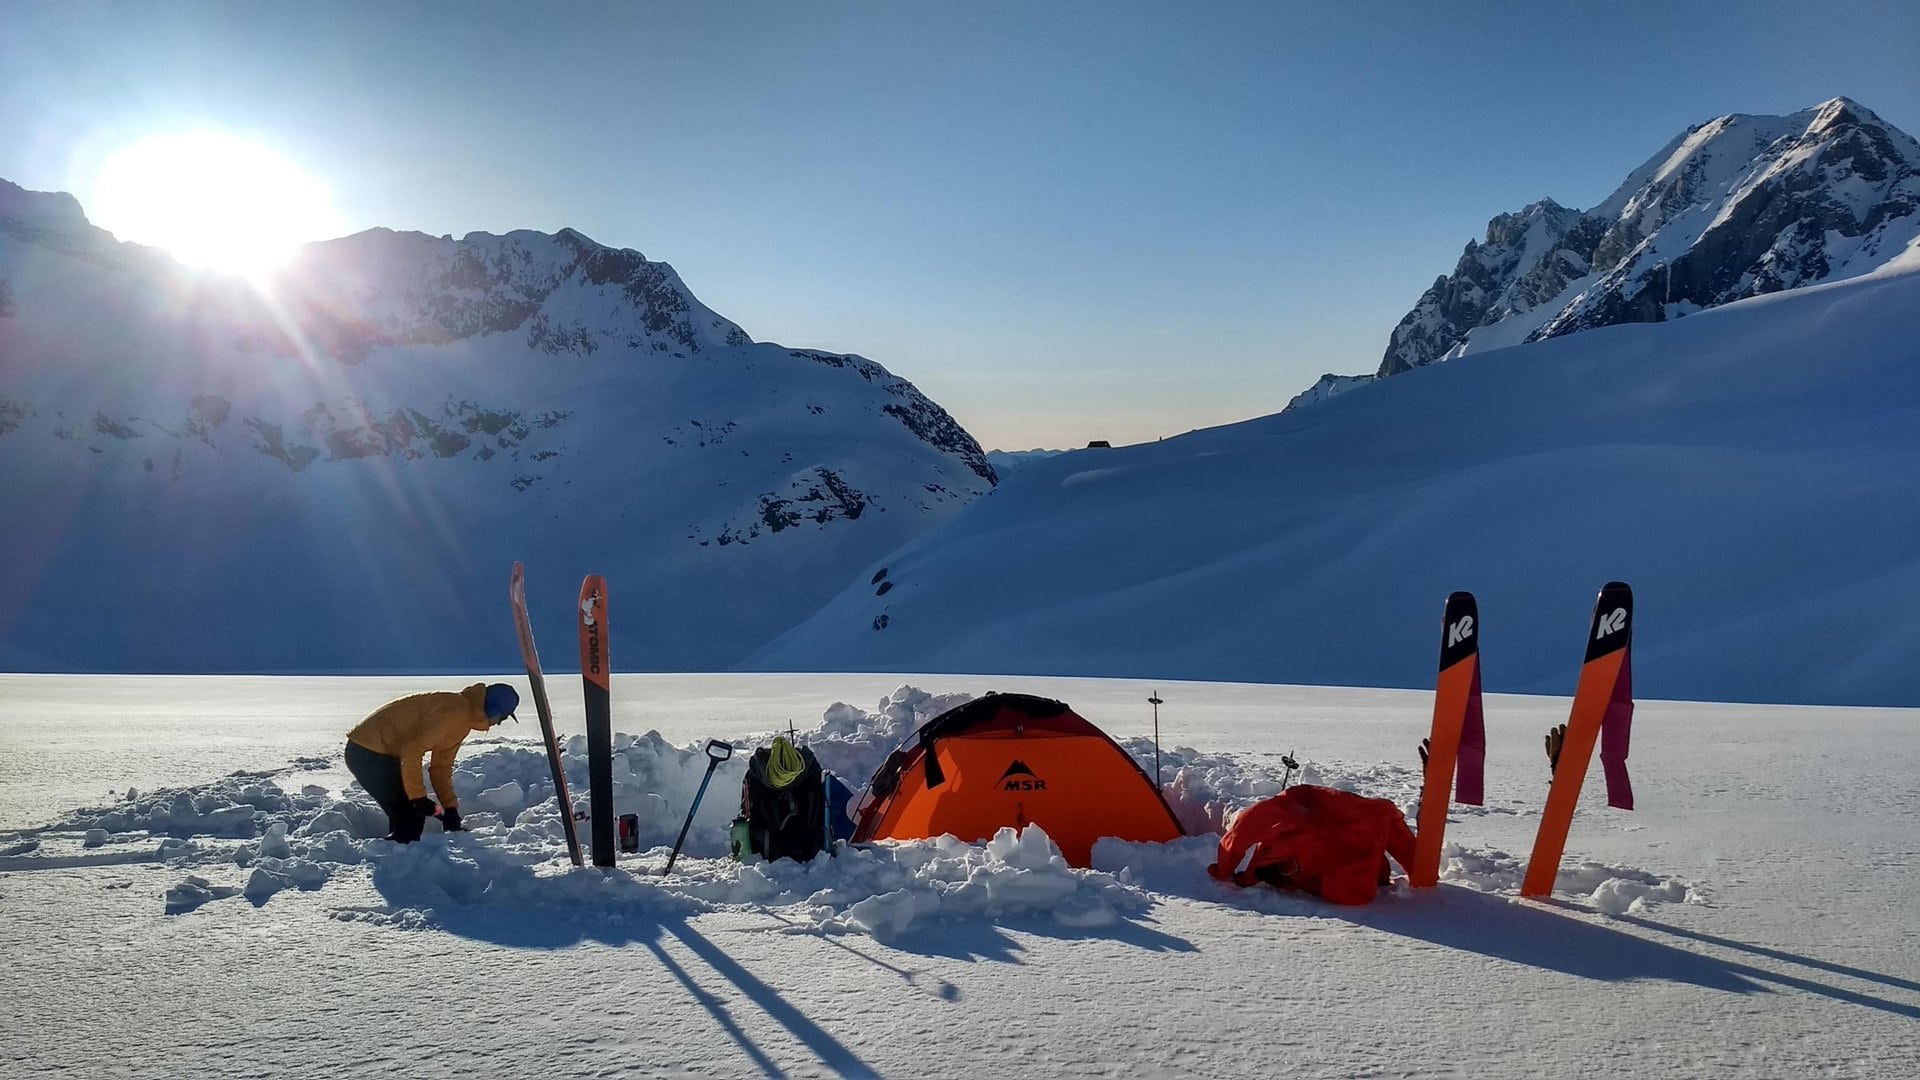
Backcountry winter camping requires specialized gear optimized for use in cold temperatures and capable of withstanding the worst of winter storms. Here’s an example. In 2018, I decided to winter camp in -25C weather with a three-season tent and an uninsulated sleeping pad designed for summer backpacking. The plan was destined to fail. 10 cm of snow carpeted the inside of my tent within 2 hours of setting up camp. To say the least, it was a breezy, sleepless night. I awoke at dawn with frostbite on my big toes. The right gear makes the world of a difference when backcountry winter camping since the margin for error is incredibly thin. A word of advice: know how to use your sleeping and cooking system so that it’s a no-brainer to operate. The last you want is to figure it out when you’re cold, your fingers are freezing and useless. I’ve outlined below the key ingredients to make your winter camping trip a whole lot smoother.
Related: How To Get Into Ski Touring (Backcountry Skiing)
Winter Shelter For The Backcountry
Your shelter is your home. It’s where you cook, rest, and weather out the storms. You might be stuck in your shelter for many days in a row. It becomes your lifeline, especially when faced with a medical emergency. You’ll find below a few criteria I look for when choosing a winter camping tent.
- Four-Season Tents:
- Choose a tent specifically designed for winter or four-season use. These tents are built to handle snow loads, strong winds, and low temperatures.
- Shape and Design:
- Geodesic or dome-shaped tents are ideal for winter camping. They offer better stability in windy conditions and are capable of shedding snow.
- Single-walled tents (without a rain fly) are low-weight, more packable and easier to set up. Condensation tends to be an issue with limited ventilation and airflow. Be prepared for your gear to get a little moist overnight. To circumvent the issue, I pitch my tent with the door into the wind and crack it open overnight. Although tempting, I also avoid camping next to a creek when moisture is plentiful.
- Double-walled tents (with a rain fly) are heavier and harder to set up but provide excellent airflow to reduce the build-up of condensation inside the tent.
- Durability:
- Look for a tent with a robust and durable construction. Reinforced materials, strong poles, extra guyline points, and quality zippers are essential for withstanding harsh winter conditions.
- Ventilation:
- Adequate ventilation is crucial to prevent condensation inside the tent. Look for tents with adjustable vents and mesh panels to allow for proper airflow.
- Weight:
- While winter tents tend to be heavier than three-season tents due to their robust construction, consider the weight if you plan on carrying the tent for an extended period.
- Some ultralight winter tents are available for those focused on minimizing weight.
- Size and Space:
- Make sure the tent is spacious enough to accommodate your party and your gear comfortably although I tend to leave my bag outside. A little extra space allows for better insulation and storage.
- Ultralight tents minimize the footprint to reduce weight making things as tight as it gets. They may not be the best choice if you’re weathering a storm and cooped up for several days in a row.
- Ease of Setup:
- In cold and stormy weather, setting up a tent can be challenging. Choose a tent with a simple and quick setup, which minimizes your exposure to the elements.
- Use your ice axe, and poles to stake the tent down. I’ve used skis in the past, but that means you won’t be able to travel efficiently when gathering water, wood or travelling the distance on the ol’ poo run.


Depending on the trip logistics, I have four systems of backcountry winter camping gear.
- A bomber, self-standing tent with a vestibule (Everest-type) for extended base camp trips where I won’t relocate often. It’s a heavier setup I only bring when the approach is short or if I fly in. I also pack a pyramid tarp (such as the Black Diamond Mega Light) to use as a kitchen shared among the group.
- A single-wall, alpine-style tent for fast and light ski traverses where I’ll be moving camp every day and carrying the shelter on my back the whole way through. It’s crazy light and easy to set up or tear down.
- A pyramid tarp shelter for multi-day traverses is a little more involved and less sturdy than a regular tent but it does leave you with plenty of headroom. Best to keep this option for fair-weather camping. I can’t be bothered with digging the pad every evening after a long day of ski touring so I resorted to a light single-walled tent.
- A snow cave if the forecasted weather is fair with little to no precipitation which greatly reduces my pack weight. I don’t recommend this system if you’ll relocate camp every day. Digging a snow shelter is a time-consuming business.
Winter Backcountry Sleeping Bag
Choosing the right winter sleeping bag is crucial for staying warm and comfortable during cold weather camping or outdoor activities. Here are some factors to consider when selecting a winter sleeping bag:
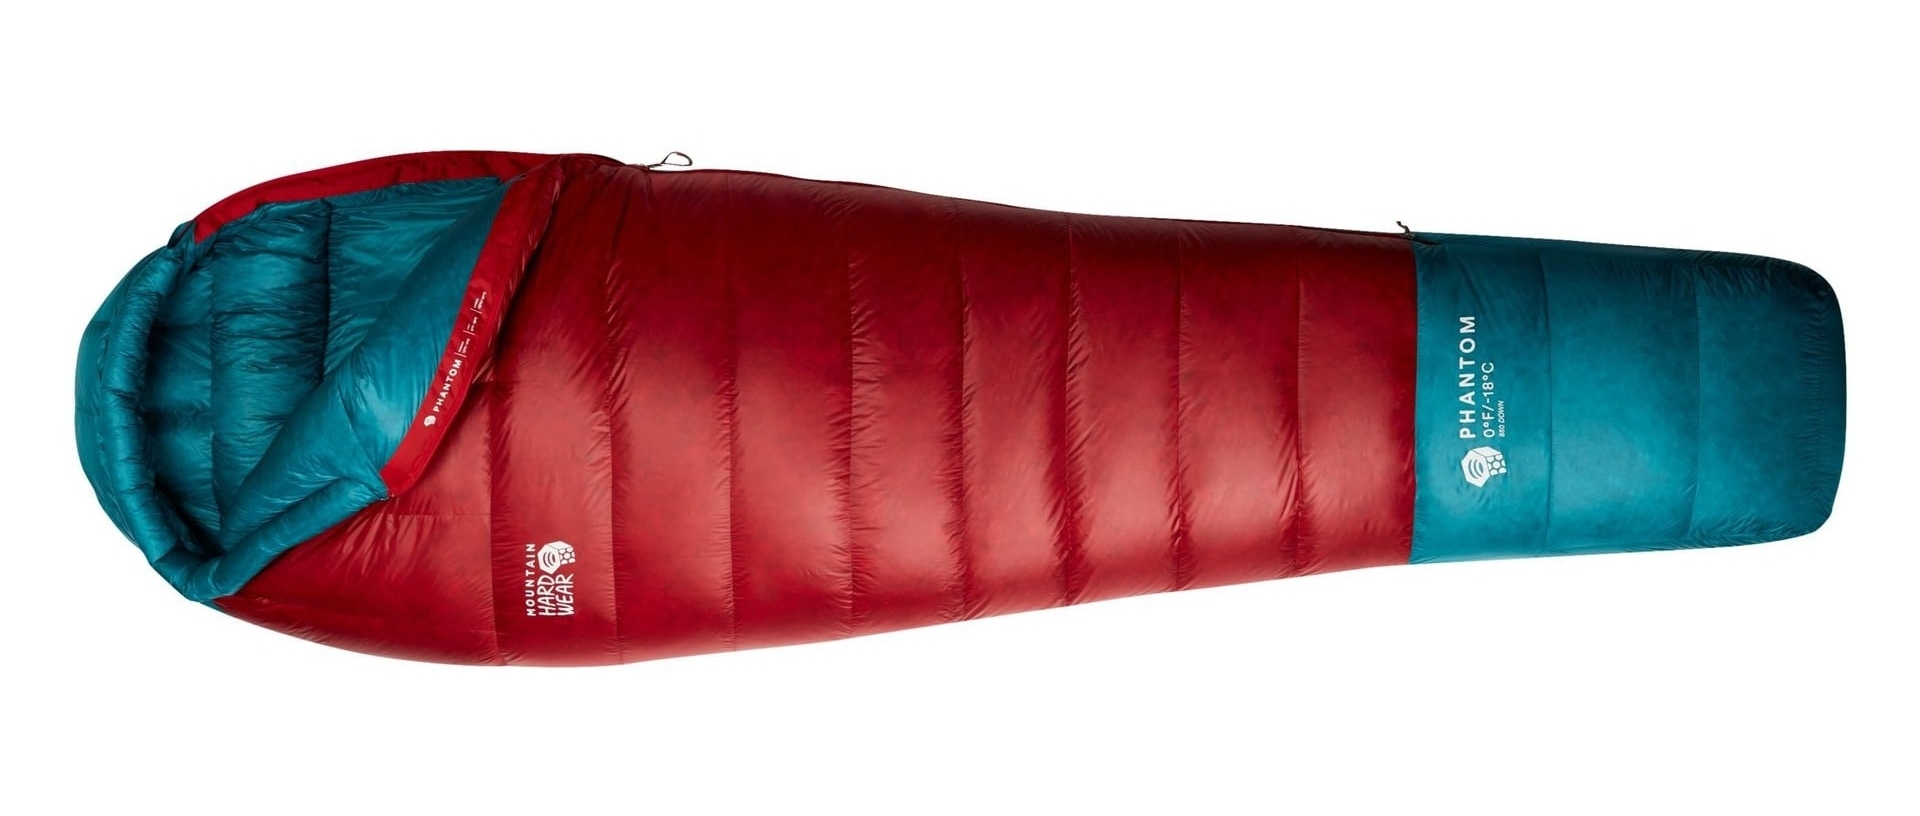
- Temperature Rating:
- Look for a sleeping bag with a temperature rating appropriate for the coldest conditions you expect to encounter. Bags are typically labelled with temperature ratings like “comfort,” “lower limit,” or “extreme.” The comfort rating is the most relevant metric to most users. I typically use a -18C sleeping which works for spring weather encountered in my playground, British Columbia, from the Coast to the Rocky Mountains. When the temps drop below the comfort rating of my sleeping bag, I sleep with my down jacket/pants and camp booties.
- Insulation Type:
- Down insulation is known for its excellent warmth-to-weight ratio and compressibility. However, down loses its insulating properties when wet, so it’s essential to keep it dry. Some models are now wrapped in a waterproof/breathable fabric (Gore-Tex) to alleviate this issue. Moisture will still accumulate within the bag which is difficult to dry out during extended winter camping trips.
- Synthetic insulation is more water-resistant and retains some insulating properties when wet. It’s a good choice if you anticipate damp conditions.
- Fill Power:
- For down sleeping bags, fill power indicates the quality and loft of the down. I aim for a sleeping bag with a higher fill power (e.g., 800 or 900) for a high warmth-to-compressibility ratio.
- Shape and Size:
- Mummy-shaped bags are more thermally efficient as they minimize the air volume around your body, but they can feel restrictive.
- If you prefer more room, consider a semi-rectangular or rectangular bag. I tend to size up my sleeping bag so I dry moist garments and boot liners inside the liner as I sleep.
- Weight and Packability:
- Consider the weight and compressibility of the sleeping bag, especially if you plan on backpacking. Down sleeping bags are generally lighter and more compressible than synthetic ones which is an important factor when planning long-distance ski traverses.
- Additional Features To Consider:
- Draft collars, hoods, and draft tubes along the zipper help prevent heat loss.
- Zippered vents along the side of the sleeping to free your arms for cooking
Remember that personal preferences and individual tolerance to cold can vary, so it’s essential to consider your specific needs when choosing a winter sleeping bag (i.e. whether you’re a cold or warm sleeper).
Insulated Sleeping Pad
When it comes to backcountry winter camping gear, the right winter sleeping pad makes a huge difference in sleep quality. You’ll find below some of the factors I consider when choosing an insulated sleeping pad.
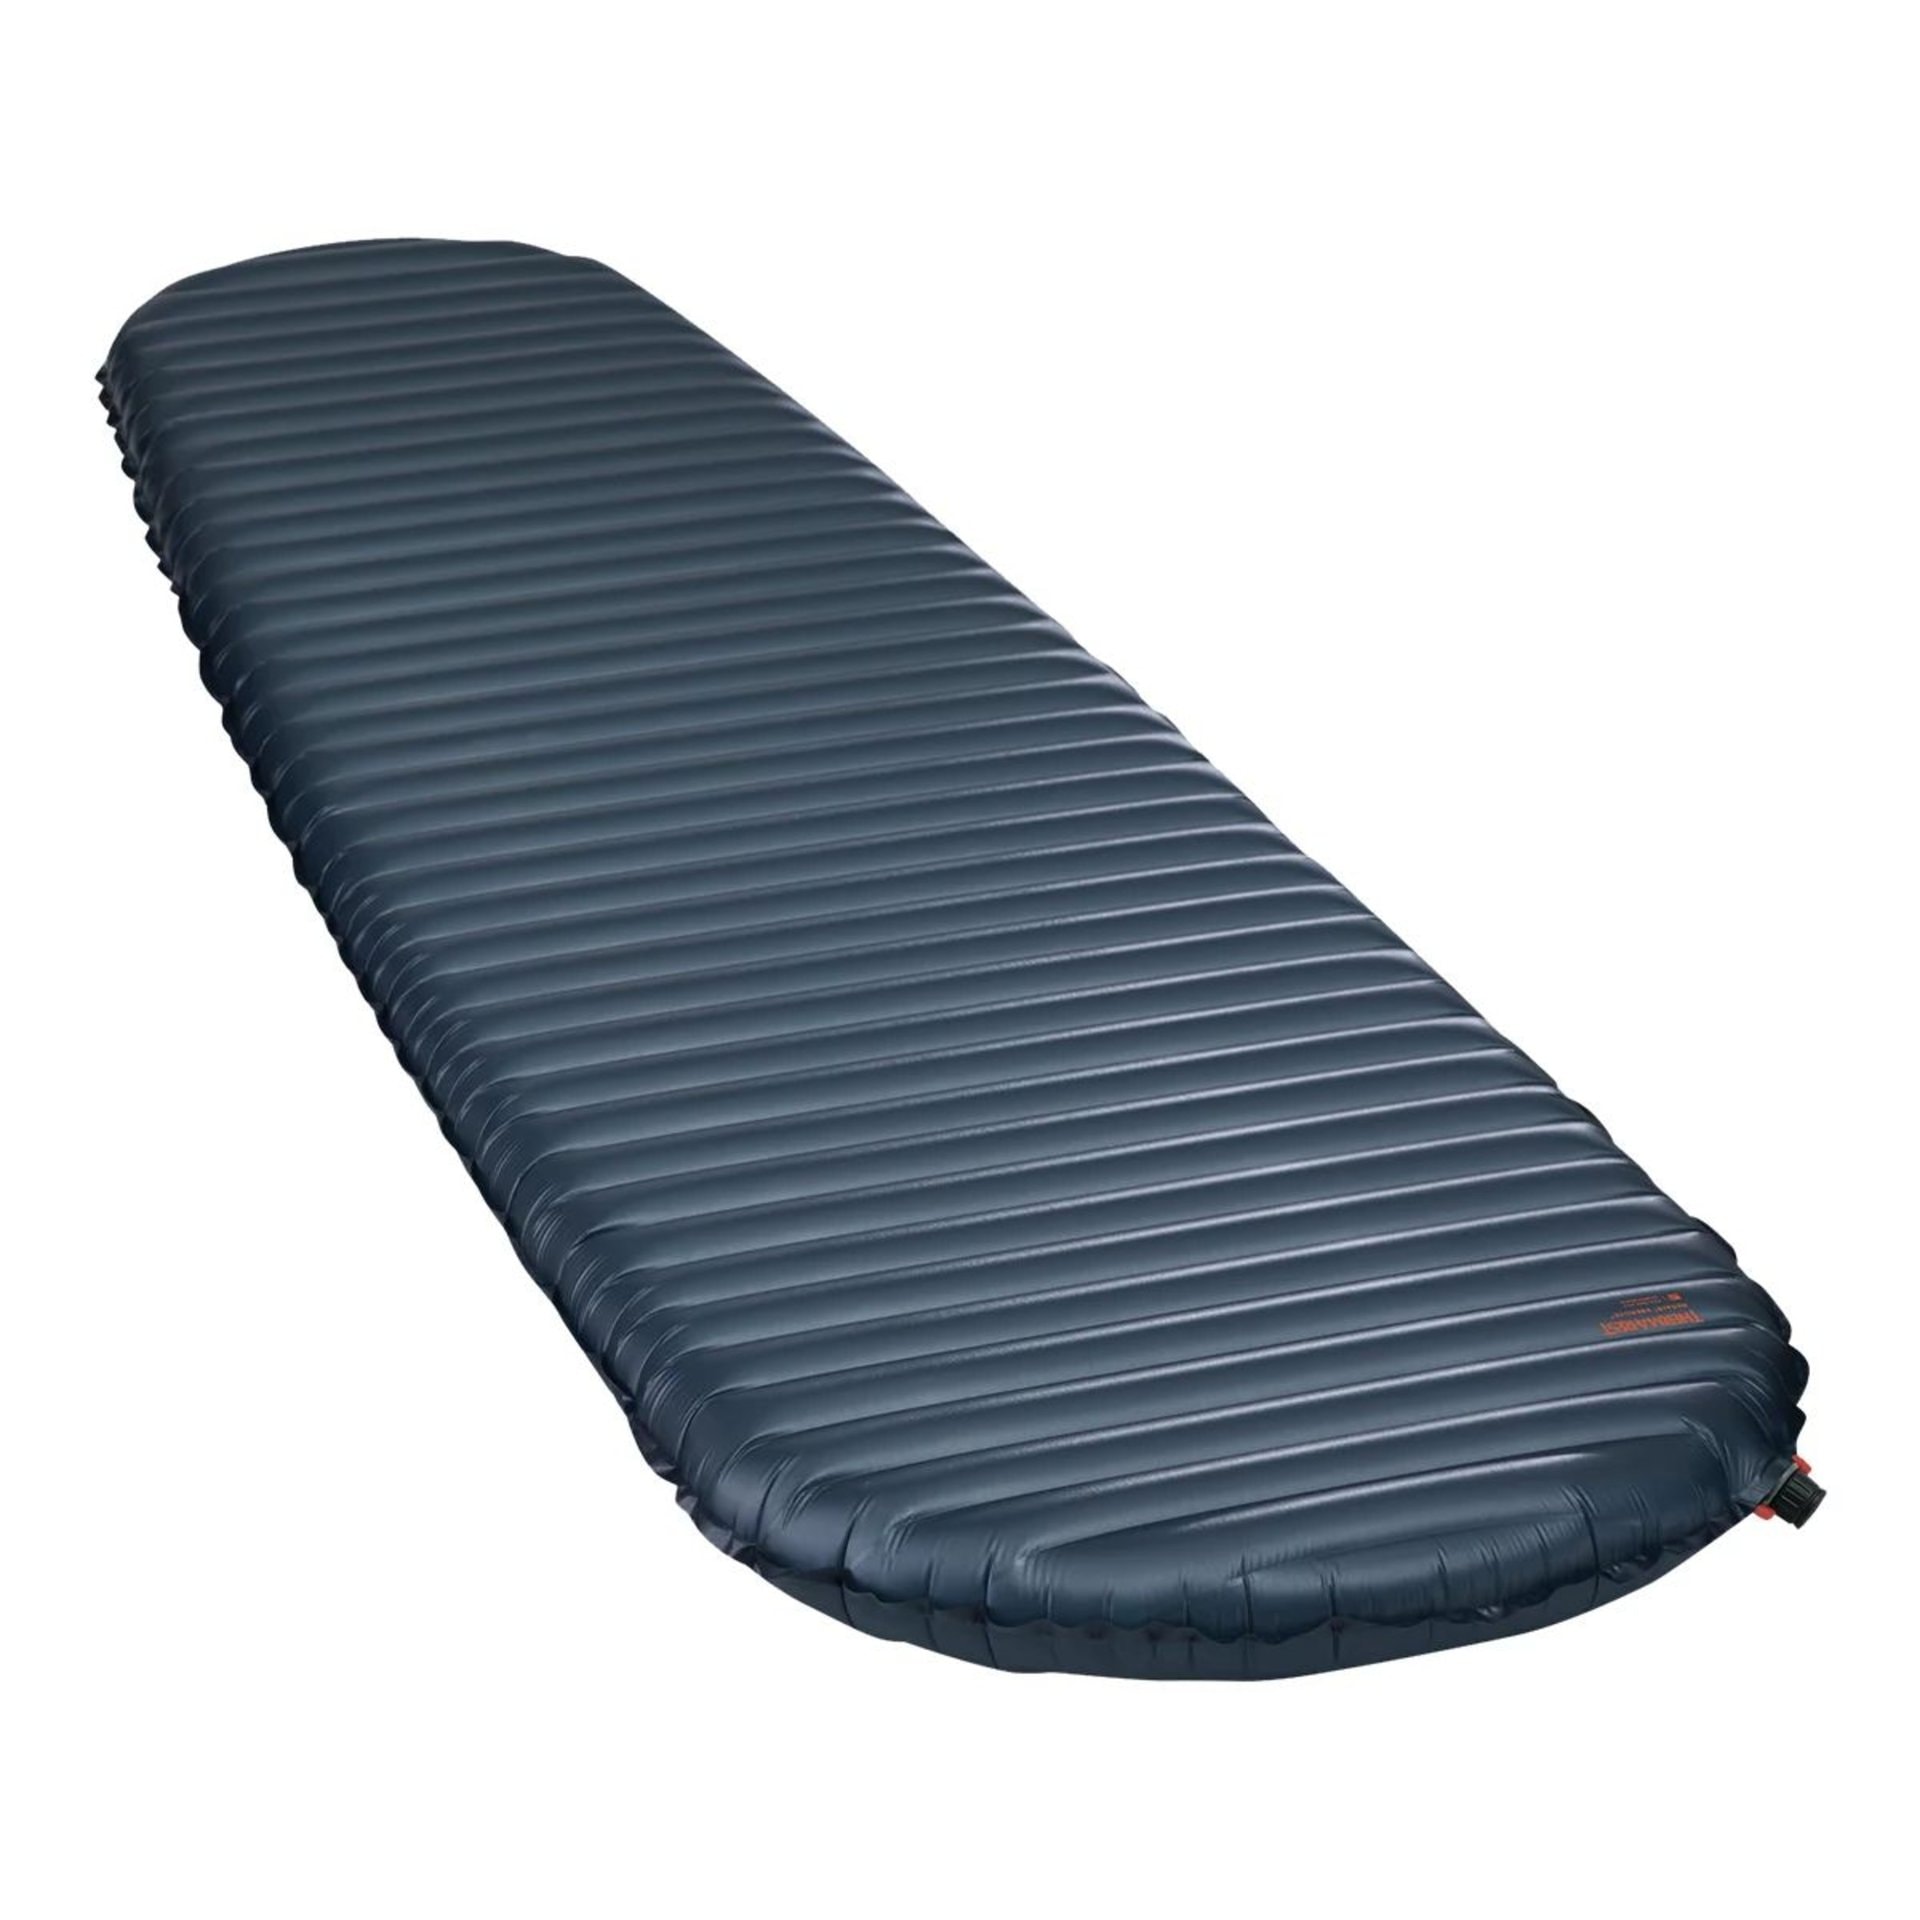
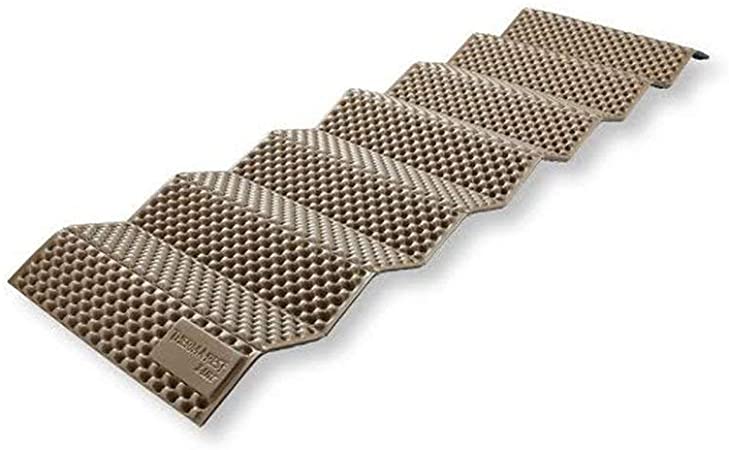
- Insulation Type:
- Closed-Cell Foam Pads are lightweight, durable, and excellent insulators. They are resistant to punctures and work well in snowy conditions. However, they are bulkier and less comfortable compared to inflatable pads.
- Inflatable Pads offer more comfort and are usually lighter and more compact when packed. Some models are filled with down or synthetic insulation while others use a heat-refractive liner to reflect heat toward your body. I prefer the latter. It crinkles but its weight for warmth is unrivalled for its packability.
- R-Value:
- The R-value measures a sleeping pad’s ability to insulate against cold surfaces. A higher R-value is better for backcountry winter camping equipment.
- Weight:
- While winter pads are generally heavier than three-season pads due to increased insulation, try to find a balance between warmth and weight, especially if you plan on backpacking.
Some folks place a closed-cell foam pad under an insulated air sleeping pad to increase your sleeping system’s insulative property. A wonderful idea if it’s insanely cold out there.
Insulating Layers For Camp
Layering is crucial for staying warm and comfortable during winter camping, as it helps regulate your body temperature and manage moisture. The key is to use a combination of different layers to trap heat, wick away moisture, and protect against wind and precipitation. Here’s a general guide for layering during winter camping:
- Base Layer:
- Top and Bottom: The reality is that you’ll roll into camp with some sweat on your skin. Choose a moisture-wicking material like merino wool or synthetic fabrics. This layer is in direct contact with your skin and helps move sweat away, keeping you dry and warm. Merino wool has anti-bacterial properties which hold odours away for those sweaty spring trips. I always slip into my camp base layers (warmer than my touring ones) as soon as the tent is erected.
- Insulating Layer:
- Top: Synthetic or down-insulated jackets are excellent choices for mid-layers. They trap warm air close to your body and provide exceptional warmth when not active.
- Bottom: Down-insulating pants or a second pair of leggings can be added for extra warmth in extremely cold temperatures.
- Outer Layer (Shell):
- You’ll often encounter stormy weather during winter camping. Wearing your waterproof/breathable shell is essential to keeping you dry and warm. It breaks the brutal wind.
- Head and Neck Protection:
- Hat: A warm hat that covers your ears is essential to prevent heat loss from your head.
- Neck Tube or Balaclava: Protect your neck and face from the cold wind. A versatile neck gaiter can also be pulled up to cover your nose and mouth.
- Gloves or Mittens: Insulated, waterproof gloves or mittens are crucial for keeping your hands warm and dry. Make sure you’ve got a dry, spare pair of gloves or mittens in your pack for when you’re sitting in camp. Don’t get them wet when boiling water!
- Footwear:
- Socks: Thick wool socks are the best to keep your toes warm.
- Camp Booties: Insulated, water-resistant booties with good traction are essential. You’ll want to get out of those damp ski touring or splitboarding boots ASAP.
- Accessories:
- Hand and Foot Warmers: These can be useful in extremely cold conditions. Sometimes, all the layers in the world just aren’t enough to keep you warm in the extreme weather you might encounter.
Remember to adjust your layers based on the weather conditions and your activity level. If you’re digging a tent entrance or building a latrine, it’s better to remove a layer to avoid sweating excessively as moisture can reduce the effectiveness of your insulation.
Cooking Systems For Cold Temps
A hearty, calorie-dense meal is crucial in cold weather. After all, you’ll be burning so much energy simply trying to stay warm, on top of your usual expenditure when ski touring or splitboarding. Having a reliable stove that works in cold weather can make the difference between eating a hot soup or ice-cold chunks.
- Isobutane or propane canister stoves:
- They are known for their packability, ease of use and low weight. It’s my preferred type of cooking system.
- Canister stoves drop in efficiency in frigid weather. In some cases, the stove might not work at all. I warm up a spare canister in my jacket before use when the temperature plummets below -11C (with isobutane).
- Some folks wrap a copper coil connecting the canister to the heating element to circumvent the issue. Apart from the obvious hazard of applying uncontrolled heat to a container filled with flammable fuel, it’s a clever way to expand the stove’s operating temperature.
- You’ll need a separate pot to cook meals. Sadly, isobutane canisters can’t be recycled or refilled.
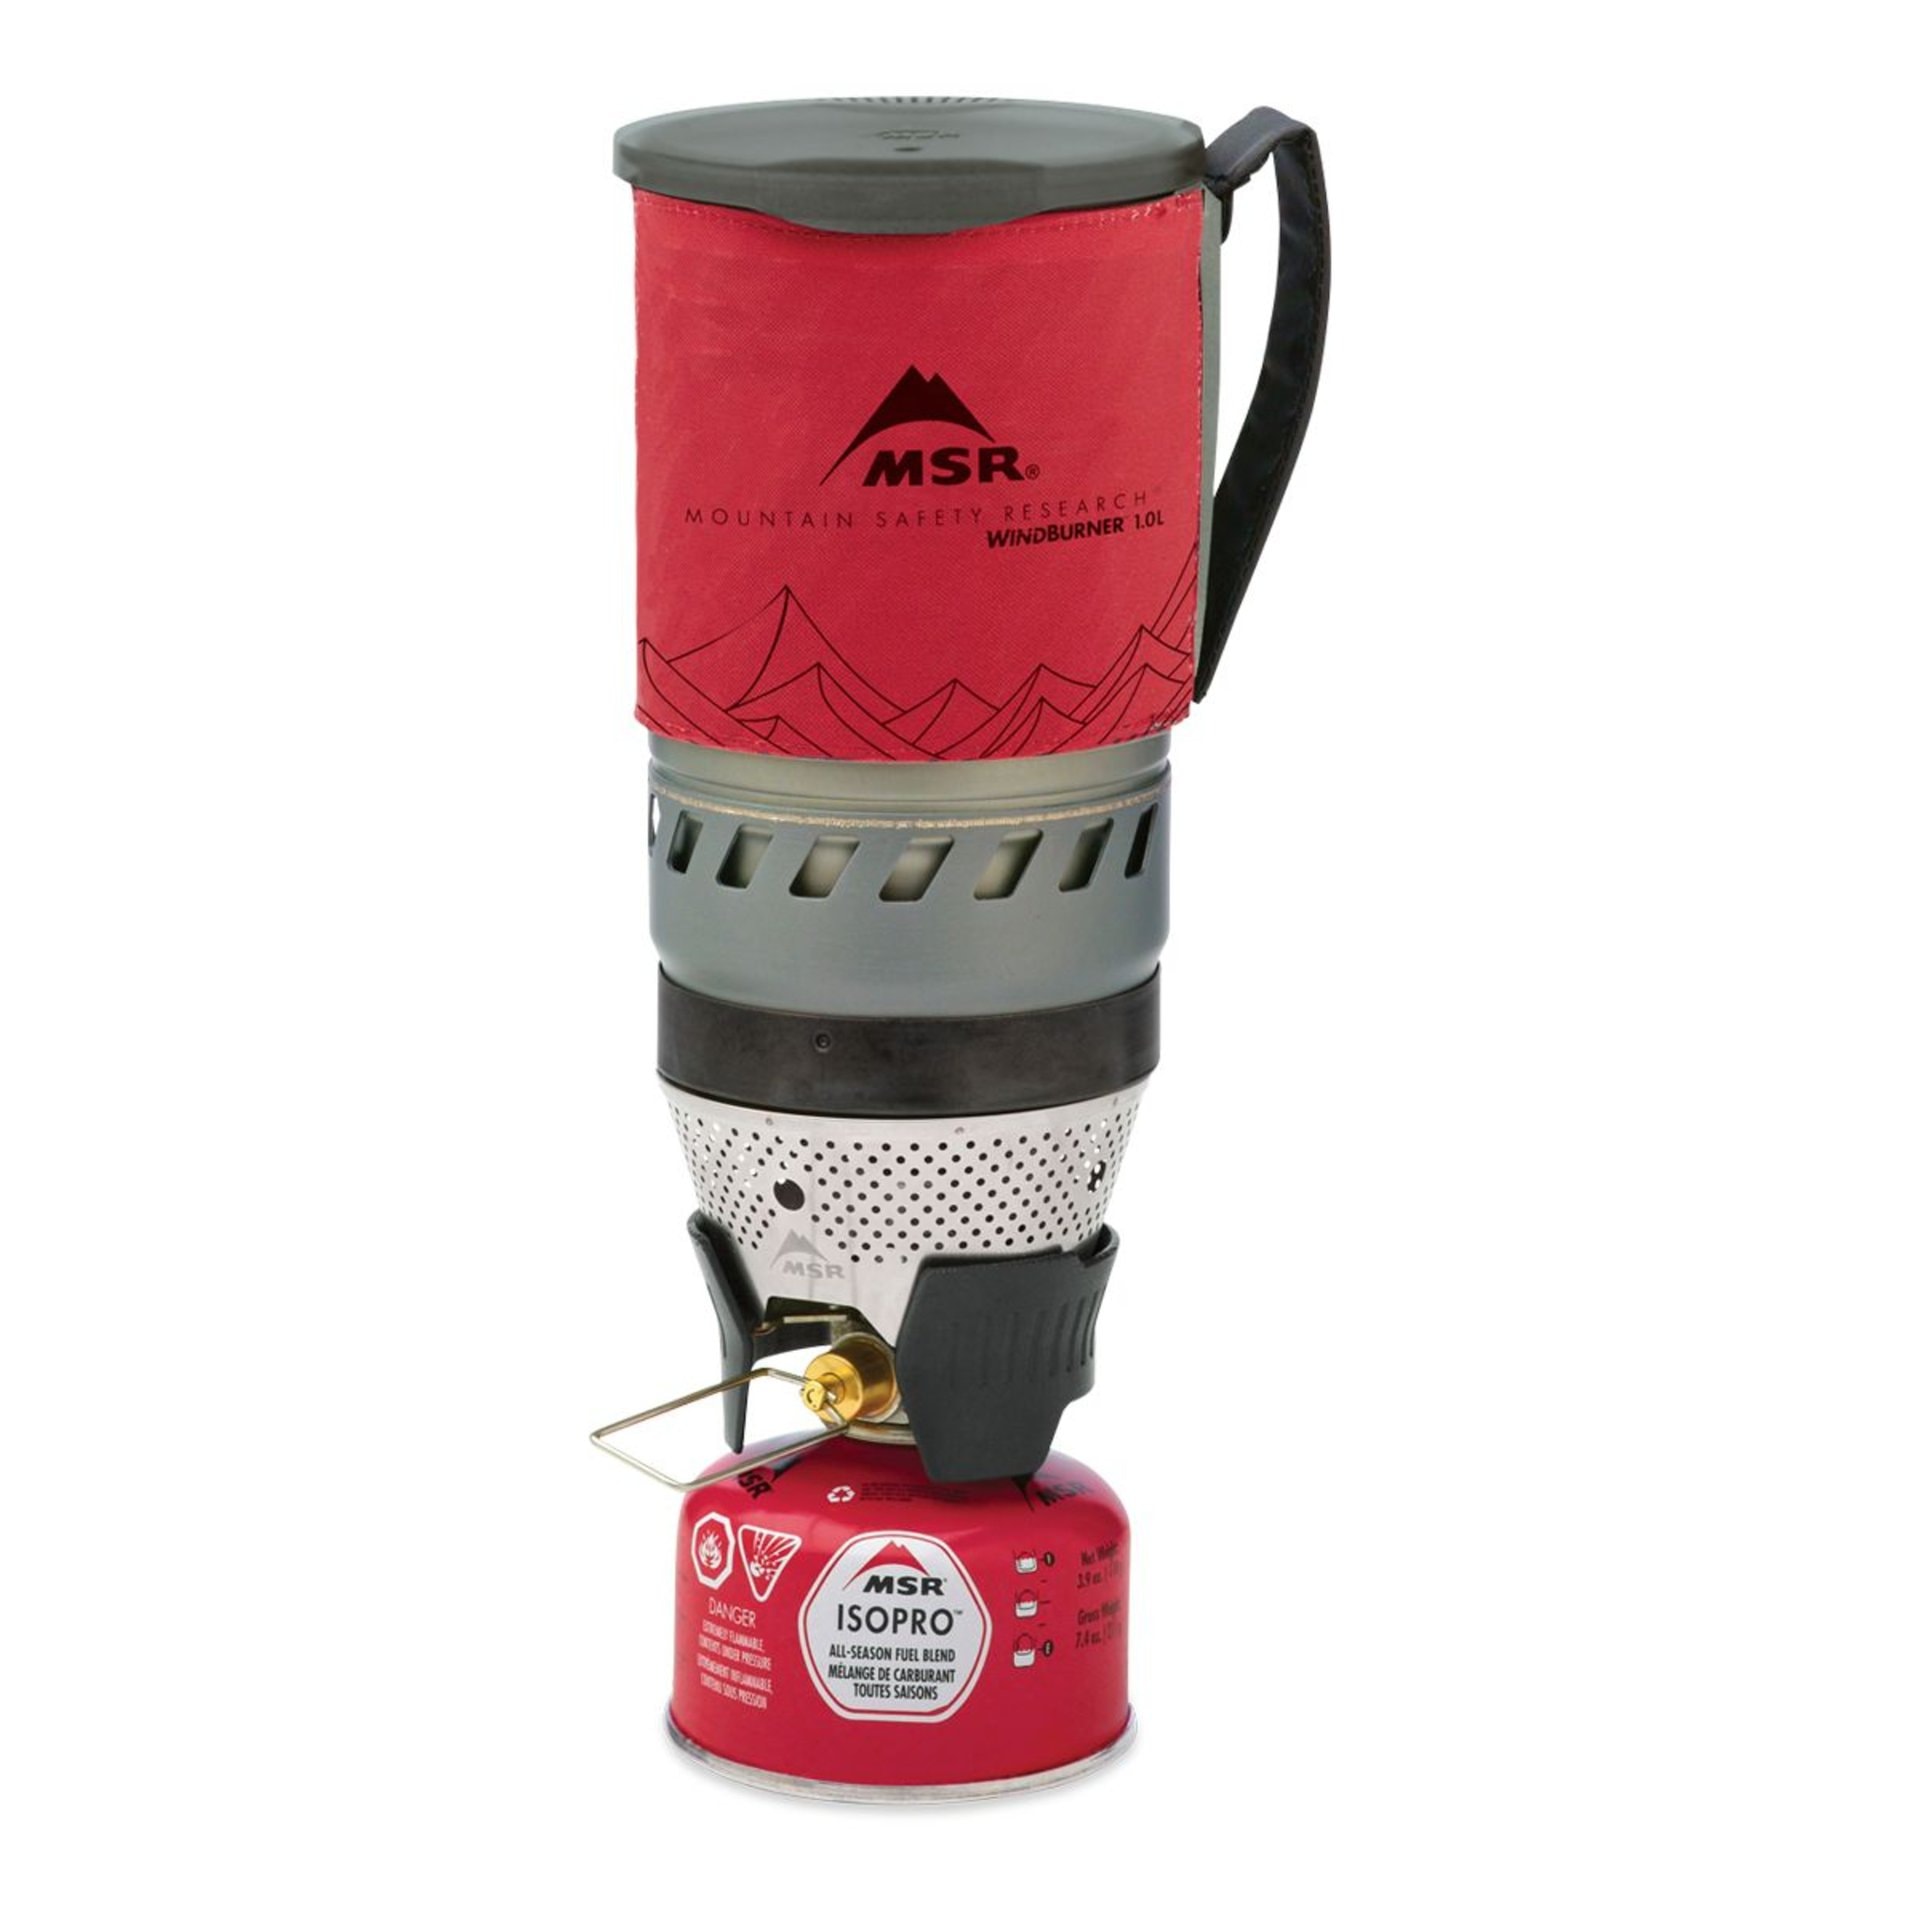
- Integrated cooking systems:
- Originally known through the brand name JetBoil, the design integrates the canister, stove (flame), cooking pot, and on some models a windscreen to minimize heat loss.
- Those systems are designed to boil water incredibly fast which is exactly what I’m looking for.
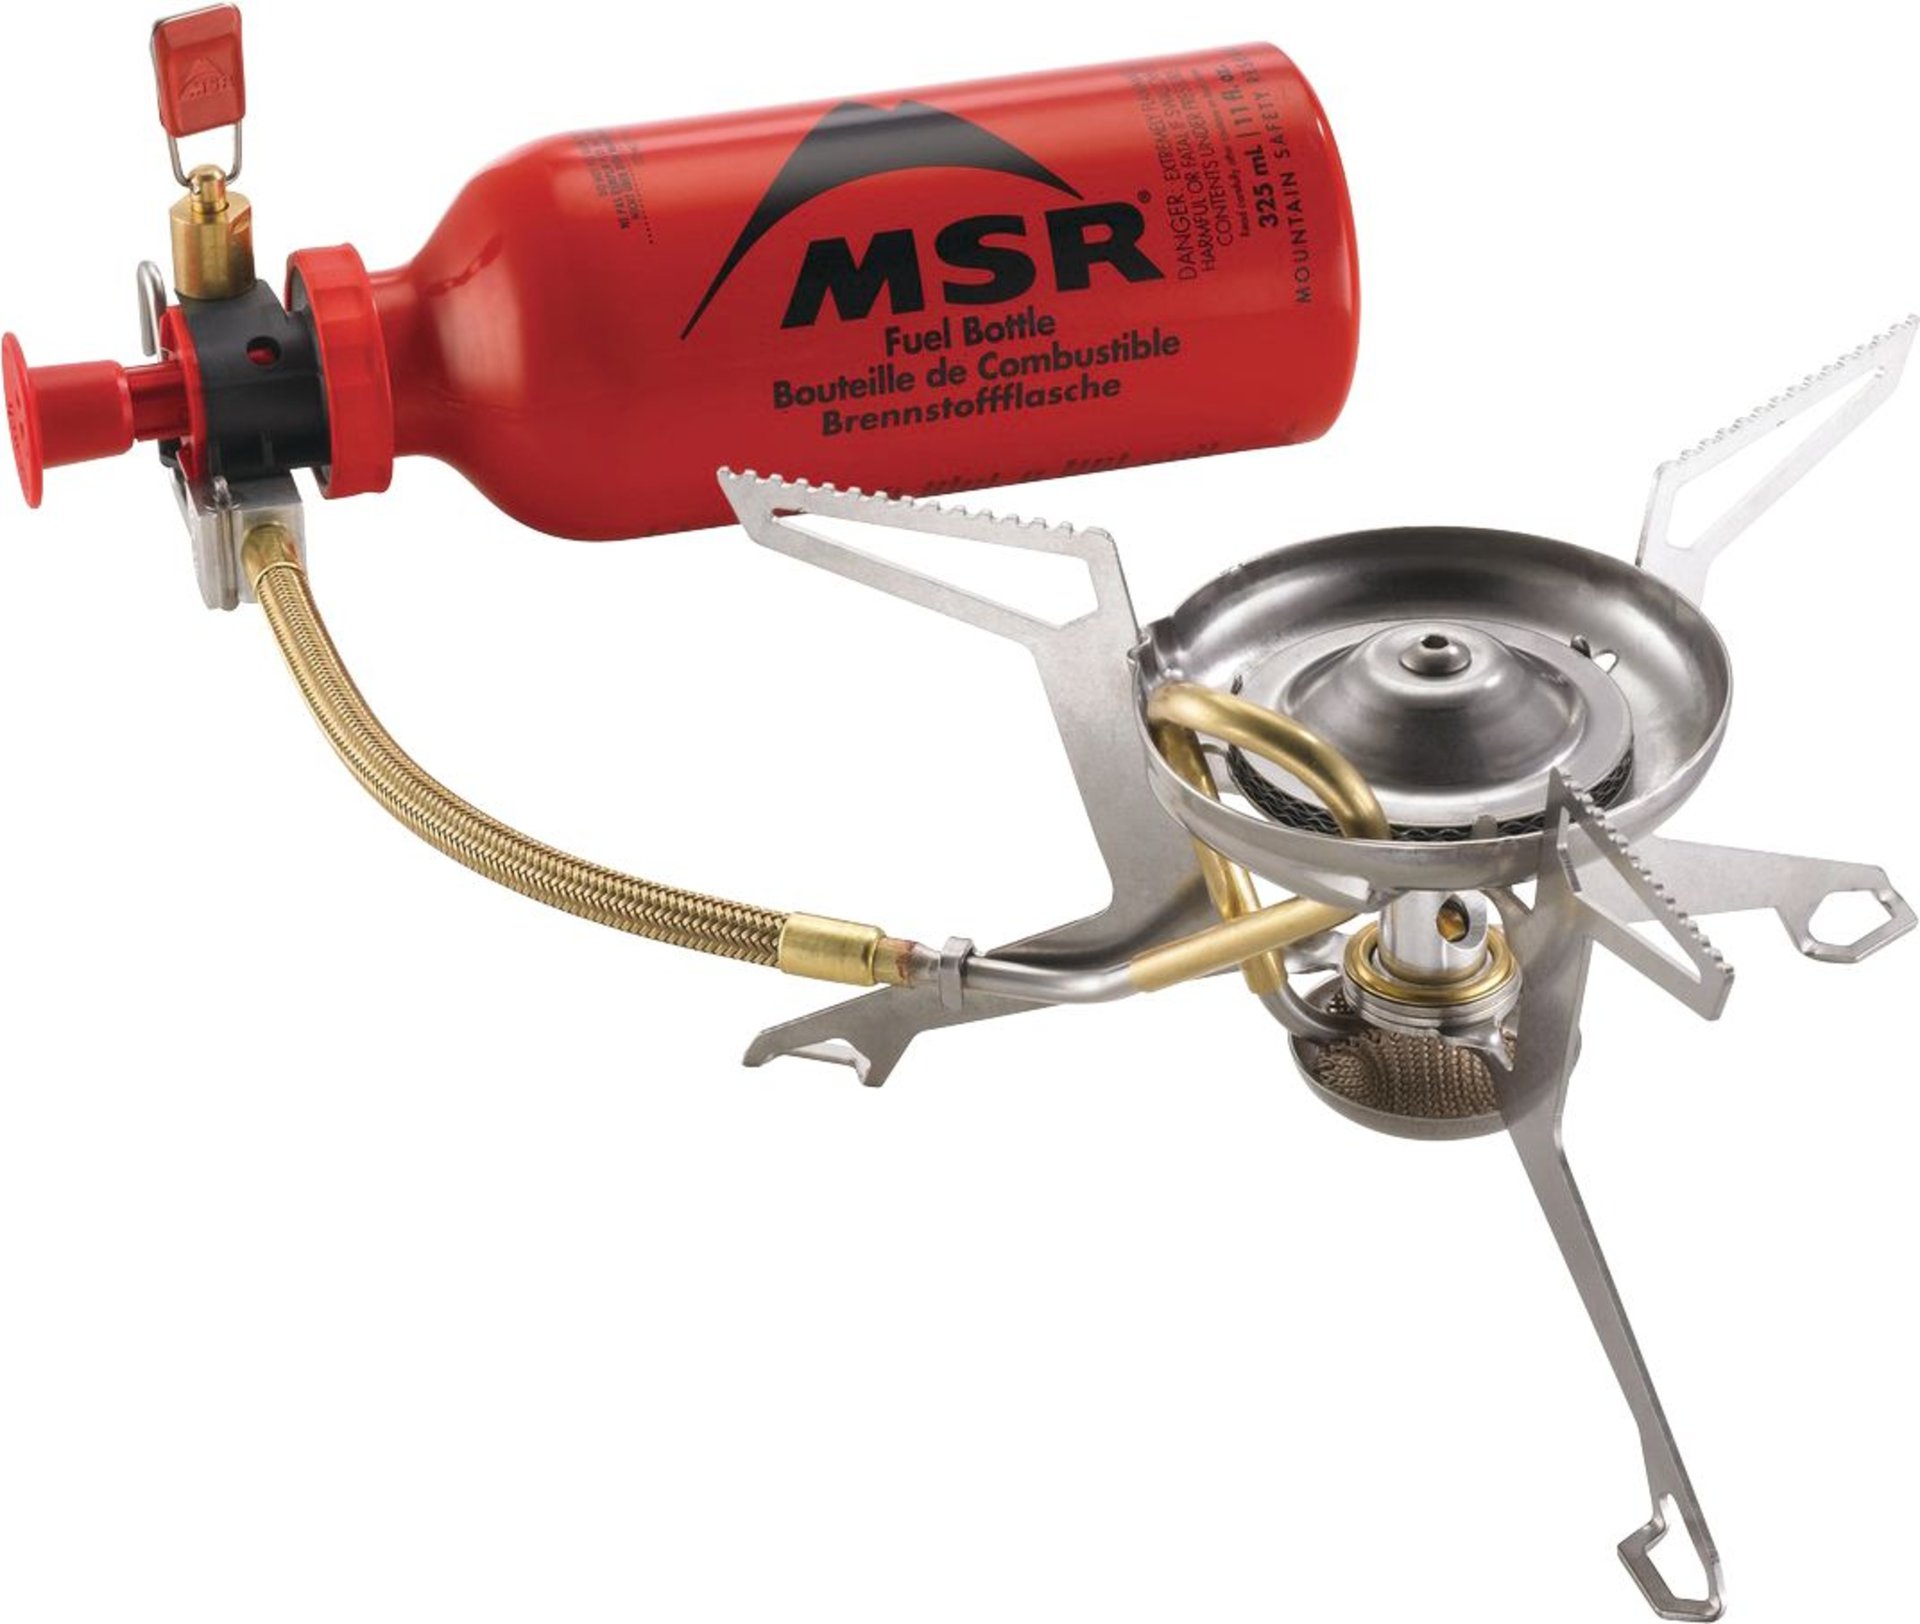
- White fuel stoves:
- While heavier and harder to use, white fuel stoves can operate below -40C which gives them an edge in truly arctic weather.
- With ample practice priming the stove, the lengthy setup becomes a non-issue.
- White fuel canisters are also refillable at some outdoor stores.
Since I exclusively rely on dehydrated meals when winter camping, I only need boiled water for breakfast and dinner. I skip lunch and snack while moving. The integrated cooking system is my solution of choice unless temperatures drop below -20C. Then, I’ll opt for a white fuel stove. I also always pack some kind of warm, salty drink (i.e. miso or chicken broth) for dinner to replenish electrolytes and heat my core. It’s the one thing I look forward to when arriving at camp. Whether you can consider your meal part of the backcountry winter camping gear is debatable but I figured it was still good advice.